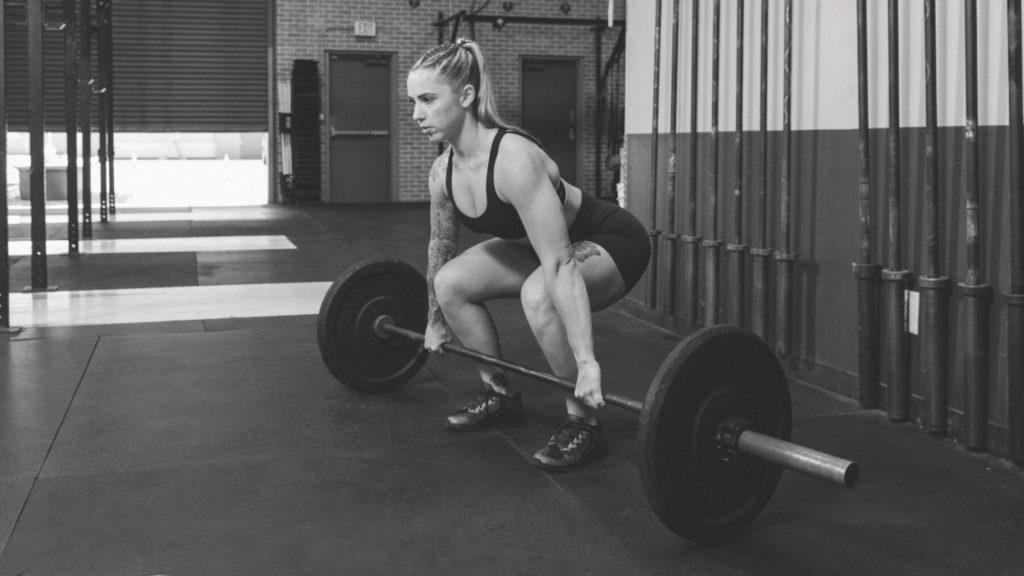
7 Steps to a Perfect Power Clean
Get access to everything we publish when you
sign up for Outside+.
Olympic lifts are a valuable tool for improving strength and athletic performance — and as a side bonus, they also help develop crazy-good muscle shape, size and definition. In fact, one could argue that the power-clean portion of the clean-and-jerk is the best exercise ever devised.
“The clean is a functional movement used [routinely] in everyday activities,” says Aaron Viscounte, CSCS, head coach and manager at Summer’s Fitness Inc. in North Canton, Ohio. “We use aspects of the clean to pick up a box and put it on a shelf, move furniture or even go grocery shopping.”
During a power clean, the barbell travels from the floor to the “racked” position at shoulder level and back down again. We tapped some elite trainers for their step-by-step expert advice on making the most of every rep.
7 Steps to the Perfect Power Clean
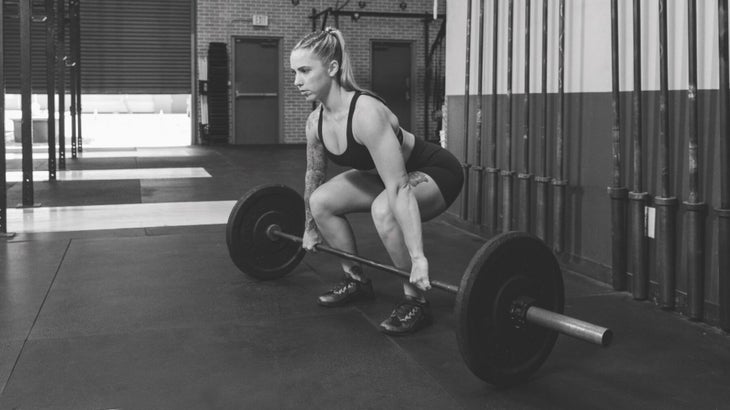
1. The Setup
Place a barbell on the floor in the center of an Olympic platform or in an area with rubber or reinforced flooring. Clear the space around you, then load your plates and secure them with clips. If possible, use rubber Olympic-lifting plates, aka “bumper” plates, which are easier on the equipment and the floor and which raise the bar higher off the ground, decreasing the distance needed to lift the weight.
Crew Cue: Warm Up Wisely
Power cleans engage most of the muscles in your body, so perform a total-body dynamic warm-up before hitting the bar. “If your hamstrings, quads and hip flexors are overly tight, it can lead to incorrect technique and risk of injury,” says Summer Montabone, CSCS*R, retired IFBB pro fitness athlete and founder of Summer’s Fitness. Include moves like leg swings, toe touches to overhead extensions, arm circles, cat/cow, Frankenstein walks and wrist circles.
2. Power Position
Stand behind the bar with your feet about shoulder-width apart and take an overhand grip just outside your legs. “The barbell should be very close to your shins,” Viscounte says. “Sit your butt down, draw your shoulders back and keep your focus forward.” This low-hip position with your thighs parallel to the floor makes for a much stronger vertical pull.
“Your shoulders should be right above or a little in front of the bar at the start, with your arms straight,” adds Josefine Holmberg, Oxygen ambassador and NPC Bikini competitor. Also, make sure your elbows are pointed outward (not back). This puts your arms in a better position to pull the bar upward as high as possible.
Crew Cue: The Hookup
It’s good practice to use a hook grip on the bar for this or any other explosive Olympic or powerlifting move: Wrap your fingers around the bar and over your thumbs and squeeze. This helps lock in your grip and gives you a little extra security during explosive movements.
Error Alert: Look Here
If your back is straight and you’re looking at the floor, your hips are probably too high. Drop them down so they’re almost level with your knees and your focus is straight ahead to protect your back and shoulders.
3. The Pull (Phase 1)
In this phase of the pull, you’ll lift the bar from the floor to just above your knees, keeping your back and arms straight and your focus forward. “For optimal efficiency and power, extend your hips and knees at the same rate of speed,” Montabone adds. “If one accelerates faster than the other, it will affect your form and possibly put your lower back under stress.”
Pull the bar straight up in a vertical line, keeping it close to your body. “Think about flexing your lats and drawing your shoulder blades together to keep the bar [in position],” Holmberg suggests. “There should be minimal movement occurring in the back, and your shoulders should remain over the bar.”
Crew Cue: Slow and Steady
Don’t rush through this phase; the power clean starts slowly and accelerates as the bar passes your knees. “This phase is the setup that generates the speed and power needed to execute the second phase,” Montabone says.
Crew Cue: Middle Ground
Center your weight in the middle of your feet to ensure a direct, upward line of pull. “If you’re on the balls of your feet, your knees will come forward and the barbell will travel out in front of you,” Viscounte says. “And if you’re on your heels, the bar may travel backward rather than vertically.”
NOTE: For expository purposes, we split the pull phase of the power clean into two phases, but during execution, there is no pause between the two; it should all be one fluid motion.
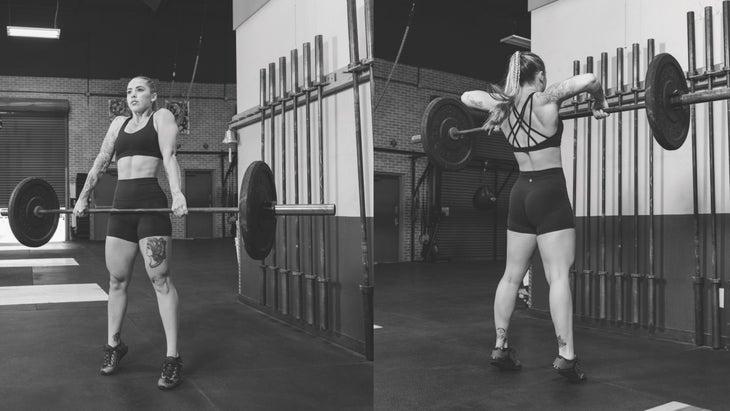
4. Hip Drive/Scoop
As the bar passes your knees, you’ll begin to accelerate.
“To generate power, open your hips and drive them forward,” Viscounte says. As this happens, the bar will come into contact with your upper thighs. “It’s not supposed to be a hard hit — more of a light brush — which helps propel the bar upward for the catch,” Holmberg says.
Error Alert: Dump the Bump
“Bouncing” the bar off your hips will cause it to move forward rather than upward, throwing you out of position. You’ll know during the catch (No. 5) if you’ve made this error because you’ll have to jump forward in order to receive the bar.
Note: Ideally, the bar should move in a vertical line from floor to catch.
5. The Pull (Phase 2)
Now it’s time to speed things up, and your goal in this phase is to get the bar as high as possible as quickly as possible. “Do a triple extension of the hips, knees and ankles — almost as if trying to perform a vertical jump — to propel the barbell upward,” Viscounte says. “Your feet may even come off the floor momentarily.” Next, shrug your shoulders and drive your elbows up toward the sky to lift the bar as high as possible. At the apex of Phase 2, you should be up on your toes with a slight rearward lean and your elbows high, and the bar should feel almost weightless.
Error Alert: Armed Is Dangerous
Your arms are not the main driver of this phase. “Trying to muscle the barbell up may happen if you have not mastered the triple extension,” Viscounte says. “This will result in the barbell moving much slower and will make the catch difficult.”
6. The Catch
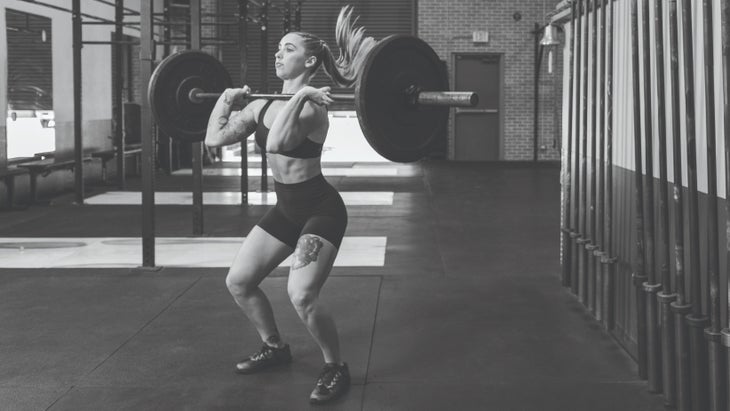
At that point of weightlessness, pull your body underneath the bar, jump your feet outward slightly and land in a quarter-squat. “Loosen your grip and whip your elbows forward and underneath the bar [as you drop down],” Viscounte says. “Catch the bar across your anterior delts with your wrists extended, elbows fully flexed and upper arms parallel to the floor.” The finish of the catch should look similar to a front squat with the bar in the racked position.
Crew Cue: Pull Down Under
Instead of passively receiving the bar, think about actively pulling your body underneath it before it starts to descend. This ensures the bar does not come crashing down on your shoulders and is a key cue when the weight gets heavier.
Crew Cue: Rack Rule
“For your elbows and arms to be in the correct position, you can’t maintain a full grip on the bar — just a couple of fingers underneath with your wrists hyperextended,” Viscounte says. If you’re trying to keep your whole hand on the bar, your elbows will drop down and you’ll likely be pulled forward and out of position.
Error Alert: Foot Fix
“It’s common for people to hop their feet out too wide in order to get underneath the bar,” Viscounte points out. “But this can put your knees and hips in a vulnerable position and could instill bad habits, leading to muscle imbalances.” Jump your feet open just a couple of inches for the ideal catch. A good litmus test: After you hop your feet out, you should be able to descend into a front squat without readjusting your stance.
7. Stand and Deliver
Once you’ve caught the weight and are balanced and steady, stand up completely. Pause briefly, then reverse all the steps to return the bar to the floor. If you’re lifting an exceptionally heavy weight (and are using bumper plates), you can drop the bar back to the floor.
Clean Up Your Cleans
Viscounte recommends practicing each step of the clean on its own. Perform an explosive deadlift with a shrug, an explosive deadlift with a high-pull, a front squat and a hang clean (executed from a position just above the knees). “You can also practice the catch by holding a light barbell or broomstick in the high-pull position, then pulling your body underneath it and whipping your elbows under and forward.”
Ancillary exercises also can improve your cleaning potential. “I’m a big fan of posterior-chain work for rear delts with a resistance band,” Summer Montabone says. “I also find it beneficial to do bridges for better glute activation, since the glutes are responsible for a lot of our power. That will help newer athletes build a solid foundation before trying a complex move like a clean.”
Model: Jessica Russo / Hair & Makeup: Linda Herberger (LAH Salon) / Shorts, Sports Bra & Shoes: Model’s Own Shot on location at Makena CrossFit, Kīhei, Hawai‘i
Published at Wed, 17 Nov 2021 10:38:05 -0800
